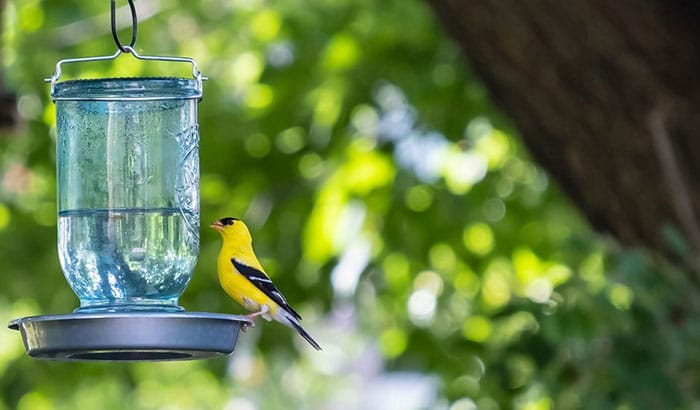
Just like humans, birds also need water to survive. Whether it’s for drinking, washing, or any other purpose, the birds need a consistent freshwater supply for their needs. The water also helps in keeping the birds cool or keeping their body temperature regulated. One way to assist the birds in drinking water quickly is to provide a bird water feeder, which is available in the nearest pet shop or purchase online.
But, this unique tool can also be assembled and made right at the comfort of your own home. But how to make a bird water feeder? This article will provide just that as I will teach different ways to make a bird water feeder using simple materials and a much simpler process. The methods introduce also promote recycling which should benefit everyone, including minor children.
Contents
Making a DIY Hanging Bird Water Feeder Using a Water Bottle
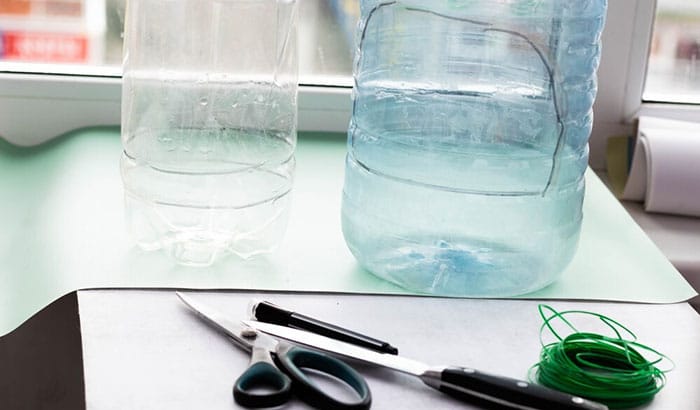
Caring for the birds means providing all their needs, including giving them enough water supply every day. The bird water feeder can be purchase outside but it can also be assembled or made on your own. Using recyclable materials such as water bottles, you can easily create a DIY bird water feeder which is more affordable and environment friendly.
Materials You Need:
In this bird water feeder, you will need a plastic bottle as your primary material. You will also need an unused plastic dish, wire, and a wooden board. All of these materials should be easily accessible in your home.
Tools You Need:
You will need a glue gun, screw, and its bolt, and pliers in making this bird water. You will also need a drilling machine and a drill bit.
Step By Step Process:
For the step-by-step guide, please check below on how to make a hanging bird water feeder made with a plastic bottle.
Step 1:
The first thing to do is take out the water bottle cap then attached it to the plastic disc. Linking can be done by using a glue gun. Please make sure that it is well-attached in the middle of the plastic dish. Take some time to let the glue stick well, and the cap is attached correctly to the plastic plate.
Step 2:
The next step is to make a hole at the center of the bottle cap and the plastic dish. This process can be done by using the drilling machine and the drill bit. Make sure to drill the hole at the center. After making the hole, get the screw and bolt the bottle cap and the plastic dish together.
Step 3:
The next step will be to get the wooden board so that it will be attached to the backside of the plastic dish. Again, use the glue gun to properly attaching the flat wooden board and make sure that it is position properly where the plastic disc should be in the center. Allow some time for the glue to dry and the two materials properly attached to each other.
Step 4:
Then, you need to get the empty plastic bottle without the cap and the drilling machine. The next step is to make three holes located at the neck of the plastic bottle. This process can be done by using the drilling machine. Make sure to evenly distribute the holes around the neck of the plastic bottle. The holles will be the pathway of the water once the bottle will be filled with water.
Step 5:
The next step is to make the handle of the water feeder. The purpose of this step is to make the water feeder suspendable and hand easily into the water. You will need to use the wire and tie it around the bottom of the plastic bottle. Tying it down in such a way that you are making a handle that will make the water feeded suspendable. Use the pliers to make the wire durable and tough.
Step 6:
The next step is to put some water into the empty plastic bottle. Once it is full, insert the bottle into the cap which should already be glue to the plastic dish and the wooden board. The bird water feeder should be ready after this step.
Step 7:
Once the bird water feeder is ready, the next step is to hang it on the tree or to any place you desire. This action is to make the water feeder accessible to the birds.
Making a Bird Water Feeder Using a Small Plastic Container
Another way to make a DIY bird water feeder is to use a small rectangular plastic container as your primary material. You will also need a large string and smaller sticks coming from the branch of a tree. Also, a bigger rock is required where the size should be small enough to fit into the plastic container.
The first step that you will do is make two holes on the opposite sides of the plastic container. After that, you will need to put the sticks coming from the tree branch into the holes then tie them using the string. Make sure to connect it around and add more strings around the upper portion of the container. Doing this action will provide additional space for the birds while adding some stability to the water feeder.
The next step is to add the rock inside the plastic container to put in the weight and keep the water feeder in place once it is positioned in a tree. The stone will also provide additional landing space apart from the sticks. After that, put some water into the plastic container and place the water feeder into the tree or your desired location.
Conclusion
A bird water feeder is essential in keeping the bird healthy and nourished. A water feeder can be easily purchased outside but having a DIY feeder is more economical and environment friendly. Also, learning how to make a bird water feeder is all about maximizing your creativity while also helping the birds at home. As a homeowner, it should be an excellent feeling if you have a backyard that provides fresh and clean potable water for all the birds coming by at your place.